How to Assemble a Lock & Tab Box
Complete step-by-step instructions for assembling a Lock & Tab Box featuring our new tenon lock system. Easier to secure, easier to open, and safer for contents.
Estimated time: 6-8 minutes
1 assembled teddy bear box with tenon lock
Lock & Tab Box with Tenon Lock
Flat work surface
-
Introduction to the new tenon lock
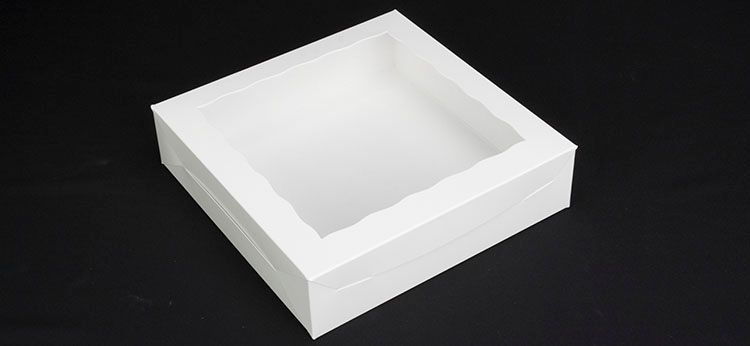
The box below is the first to feature our new tenon lock. This lock is easier to secure, easier to open, and most importantly, can be latched and unlatched without risk of goofing up goodies on the inside.

-
Start with the flat box
This is what you will see when you first lay eyes on this updated box.

-
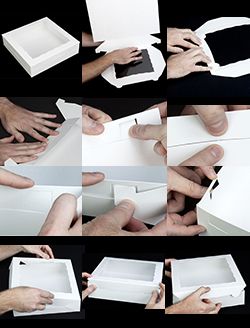
Pop the nicks on side panel slots
Carefully pop the tiny bits of paperboard connecting the top of the almost-square slots on the side panels. These bits are called "nicks" and are strategically placed to prevent elements of your boxes from being bent during shipping. Not every box will have nicks on these almost-square slots.

-
Pop the nick in the arched slot
The long arched slot has a tiny little connecting nick in the middle. Pop that little bit as well.

-
Pre-break the scores
To ensure easy setup and the crispest corners, pre-break the scores by folding the panels all of the way over and in towards the center of the box 180 degrees.

-
Crease the lid front score
Creasing the score on the front of the lid to make it as sharp as possible will allow the lid tabs to line up perfectly with their corresponding slots when it comes time to close the lid.

-
Pre-break the tenon panels
Don't forget the four little panels with the catch or "tenon" on the ends.

-
Benefits of pre-folding
It is possible to set up the box without pre-folding these panels, but doing so breaks the tiny wood fibers in the paperboard and trains the structure to almost fall into place while you are setting it up.

-
Anchor the side panel first
Before putting the tab through, hold the side panel in place by placing a finger on the top above the slot. Anchoring the panel first makes setting up the corners so much easier.

-
Manipulate the entire tenon panel
When slipping the tenon into the slot, manipulate the entire tenon panel to get it in. Do not try to bend in only the little catchy part at the top as you would be fighting the material unnecessarily and may even damage it. Pull the bottom of the tenon panel slightly away from the box as you tip the top part into the flappy slot. Using the flexibility of the whole panel not only gives you more to hold on to, it allows the temporary warping to be spread out over a wider area. This little trick helps prevent unwanted creasing and just makes everything easier.

-
Slot engagement from another angle
Here is a picture of the slot being engaged from another angle. By pulling the bottom of the tenon panel out and tilting the top towards the slot, you can complete a corner using nothing more than the tips of your fingers.

-
Fully-engaged tenon tab
Here's what the fully-engaged tenon tab looks like for a completed corner.

-
Close the lid - slide wings into slots
To close the lid, first slide the lid wings into the long slots on the side of the box using your fingertips to guide the wings into the arched cut in the side panel. Use your thumbs to lower the lid till it is almost closed.

-
Guide front tabs into slots
When the lid is nearly closed, use your thumbs to guide the round tabs on the front flap into the slots on the front panel. Apply a little pressure on the top to finish closing the box.

-
Opening the box
To open the box, use the tip of a finger to pull up on the round edge of the front panel.

-
Side access - disengage tenon panels
If you want to slide the contents out the side of the box (versus lifting it out of the top), simply open the side like a drawbridge by first disengaging the tenon panels. Just slide your finger underneath the tenon panel and pull the tenon out of its slot.

-
Lower side panel for easy access
Lower the side panel when both locking tabs are free and you can slide out the good stuff without having had to reach inside the box to open the side.

-
Video tutorial available
If you are more of a video person, we put together a short movie showing how to set up your bakery box.