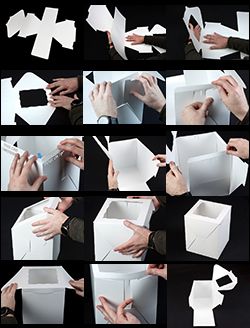
Complete step-by-step instructions for assembling a tall cake box. Learn how to properly fold, attach, and secure all components for professional cake packaging.
-
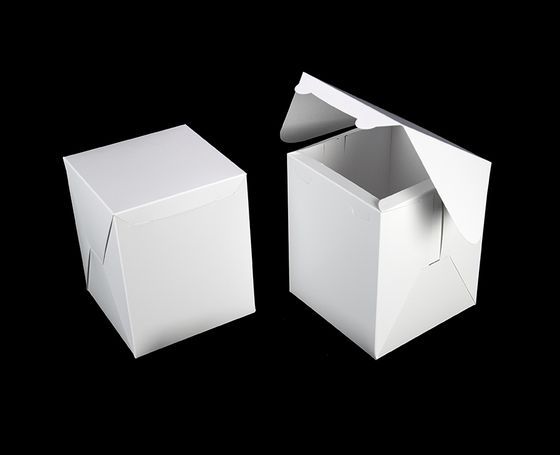
Review the flattened box
This is what the outside of your flattened box looks like.

-
Pre-break the paperboard fibers
To have crisp corners we need to flip the box on its back and pre-break the paperboard fibers on the scores.

-
Fold panels over at 180�
Go ahead and fold the panels over at 180�.

-
Handle windowed panels with care
If the box is windowed, there is less material in the windowed panel so special care should be taken to prevent false scores. Pin down the wall adjacent to the windowed panel applying downward pressure right next to the crease and use your whole hand at the end of your opposite arm to fold the window panel over.

-
Fold it all the way down flat
Fold it all the way down flat.

-
Don't forget the little flap on the front
It is easy to forget the little flap on the front of the lid but do not do it (don't forget it, I mean).

-
Fold the little flaps at the tops
There are also some little flaps at the tops of the side panels and the front panel. Fold those little guys over all the way in as well.

-
Engage the tabbed panel into the slot
After you have pre-folded the crease lines, fold up one of the side panels to 90�. Bring up the back panel and prepare to engage the bottom of the tabbed panel into the long slot of the side panel.

-
Guide bottom notch into frowny slot
Guide the bottom notch of the tabbed panel into the frowny slot as you fold up the back panel to a right angle. Always engage the bottom tabs before you engage the top tabs.

-
Bow paperboard to slip top tab into slot
Temporarily bow the paperboard between the bottom and top tabs till you can slip the top tab into the top slot. Using a finger to warp the paper halfway between the tabs is the slickest strategy.

-
Lock the front panel tabs
Bring up the front panel like you did with the back one and again lock the bottom and top tabs on the same side as before. This is what the side of your nearly-setup box should look like.

-
Arrange flaps in proper order
Remember those little pieces you folded over at the tops of the side panels and front panel? You want to make sure the little flap coming off of front panel is below the ones coming off the side panels. This makes the box stronger. Front below the sides. The first panel to fold down has a 1 stamped on it. The second flaps to fold down have a 2 stamped on them.

-
Insert cake over drawbridge side
With one side done, you can splay open the other side and slip your cake in over the drawbridgey side panel.

-
Secure the other side
Once the cake is in, you can secure the other side the same way you did the first. To stabilize the side panel as you are engaging the locks, you can hold on to the little folded flap at the top of the side panel with one hand.

-
Begin closing the lid
With the side panels all locked up, we can begin to close the lid. Square your body to the front of the box in an athletic stance and use both hands to fold the wings of the lid down against the outside of sides of the package walls.

-
Tuck wing tips into frowny slots
You may need to use your fingertips to get the lead edge of the lid wing tips into the frowny slots. The tips of the lid wings slide over the outside bottom locking tabs and tuck into the horizontal slot of the side panel.

-
Start the wing tips before closing completely
Don't close the lid all of the way just yet. It should look like this on the side with the wing tips started.

-
Engage the frog eye tabs
We didn't close the top all the way because we want to start the edge of the "frog eye" tabs at the front of the lid. Place your thumbs over these half-circle tabs to gently press them into the corresponding slots as you use a finger or two to apply pressure to the top edges of the lid to lower the panel to closed.

-
Opening the box - free the wing tips
To open the box, use your finger tips to get under the edge of the lid wings and pop them out from their slot by lifting up and out.

-
Free the frog eye tabs
Gently hold the body of the box at a corner and use one wing as leverage to free the frog eye tabs from their slots in the front panel.

-
Access the tabbed panels
With the lid open, we can get at the tabbed panels in the side where some cool nerdy box stuff happens. You can first stabilize the panel by grabbing the flap at the top with one hand and with the other, put a fingertip under the edge of tabbed panel - halfway between the top and bottom tabs.

-
Bow panel to release tabs
Pull the paperboard away from the center of the box with your finger till the bowing panel pops out from both the top and bottom tab slots.

-
Remove cake from box - video tutorial available
Do the same with the other panel on this same side and lower the drawbridge of the innermost panel. You can pull your cake out or take down the other side as well and push the cake board out of the box. If you are more of a video person, we put together a short movie showing how to set up your tall cake box.